If you’ve ever noticed your guitar frets buzzing no matter how much you tweak the action, or if some notes just don’t ring out like they used to, your frets might be the culprit, and a repair person can help.
Over time, frets can develop divots, dents, and uneven spots from regular playing.
Don’t panic – you don’t need to replace your entire fretboard to fix this.
With a process called fret levelling, you can restore your frets to their former glory and get your guitar playing like new again.
In this guide, I’ll walk you through everything you need to know about fret levelling, from why it’s necessary to how you can do it yourself.
But if the idea of sanding down your frets sounds a bit scary—or if you don’t want to invest in expensive tools—I’m here to help.
As a professional guitar tech, I’ve levelled countless frets and can get your guitar playing perfectly in no time.
Why Do Frets Wear Out?
Let’s start with the basics. Every time you press a string against a fret, it creates friction. Over time, this friction wears down the metal, leaving little divots or dents—especially in the spots where you play the most (hello, cowboy chords!).
Here are some tell tale signs your frets might need some TLC:
- Buzzing strings: If your guitar buzzes even after adjusting the action, uneven frets could be to blame.
- Uneven action: Some frets might feel higher or lower than others, making your guitar harder to play, especially if there’s a damaged fret.
- Intonation issues: If your guitar sounds out of tune even after tuning up, worn frets could be the culprit.
- Strings catching: If you have deep enough divots in the frets, you might find they catch when you bend (creating a nasty feeling and a pinging sound)
So now we understand the issues, lets look at what fret levelling is, and how it can repair worn and dented guitar or bass frets (including frets with deep divots).
What is Fret Levelling?
Fret levelling is the process of sanding down your frets to create a smooth, even playing surface.
After you’ve sanded them down so all the guitar frets are the same height – then you need to re-crown the frets – which is the process of rounding them back over (flat frets wont play well!).
Think of it like giving your frets a haircut—trimming the high spots so everything sits at the same height.
Here’s why it’s worth the effort:
- Smoother playability:No more buzzing or dead notes.
- Better intonation: Your guitar will stay in tune across the entire fretboard.
- Extended fret life: Levelling can add years to your frets before a full refret is needed.
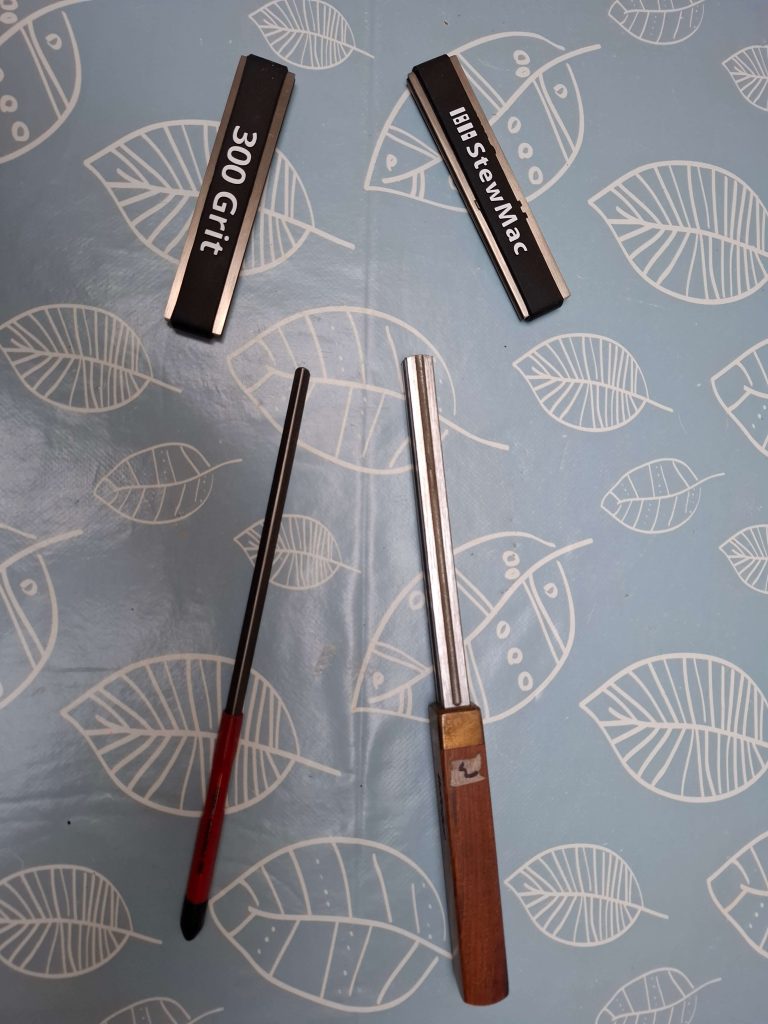
While fret levelling is a DIY-friendly job for some, it does require specialised (and pretty expensive) tools and a steady hand.
If you’re not comfortable doing it yourself, I’m here to help. As a professional guitar tech and repair person, I’ve got the tools and expertise to get your frets looking and playing like new.
How to Level Your Frets: A Step-by-Step Guide
If you’re the hands-on type and want to give fret levelling a try, here’s how to do it.
But if this sounds like too much work (tbf it’s a pretty long job), don’t worry—I’m just a booking away!
Fret Levelling Step 1: Prep Your Guitar
First things first, loosen and remove the strings. This will give you full access to the fretboard.
While you’re at it, take a moment to clean the guitar fretboard and frets.
A little lemon oil or fretboard cleaner can work wonders for removing built-up grime – if it’s really bad, you can even use lighter fluid to clean of the fretboard (yes, seriously!).
Once the fretboard is clean, protect it with masking tape. This will prevent accidental scratches while you’re working on the frets.
Fret Levelling Step 2: Check for Uneven Frets
Now it’s time to see how bad the issue is (or, hopefully isn’t!)
Checking how many frets are uneven across the fretboard will let you know if you need to level ALL the frets or if you can just focus on a few frets (this is called spot levelling).
Set the guitar neck perfectly straight
Before you can check for high frets, you need to make sure you guitar (or bass) neck is set perfectly flat (so you are measuring correctly).
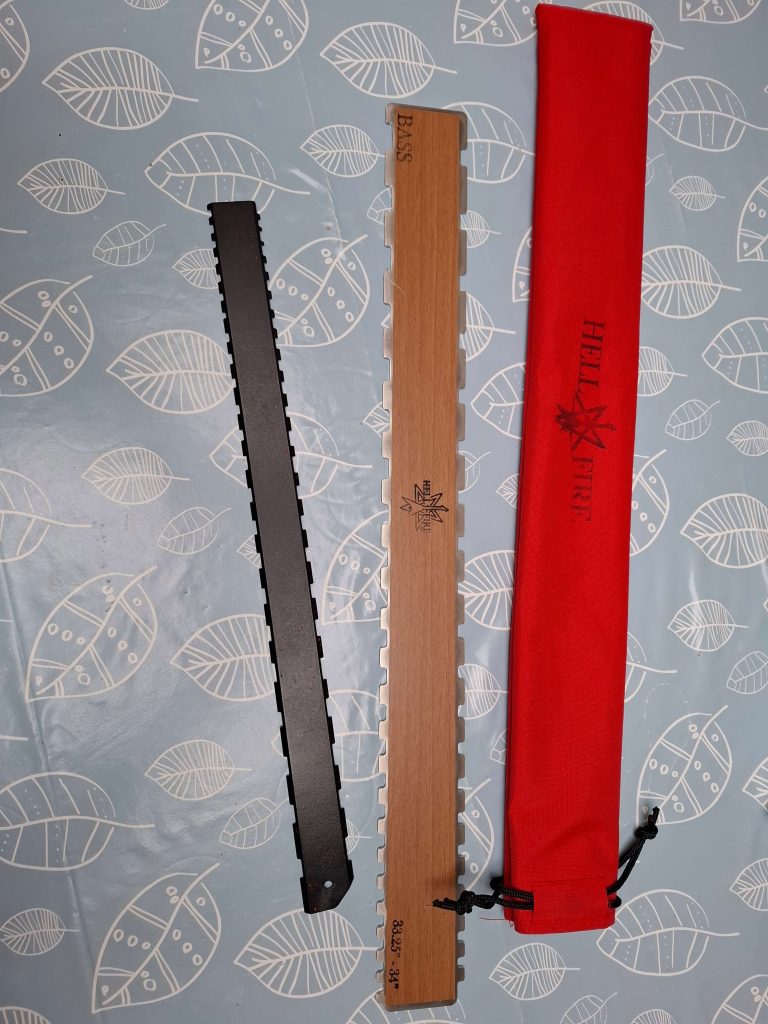
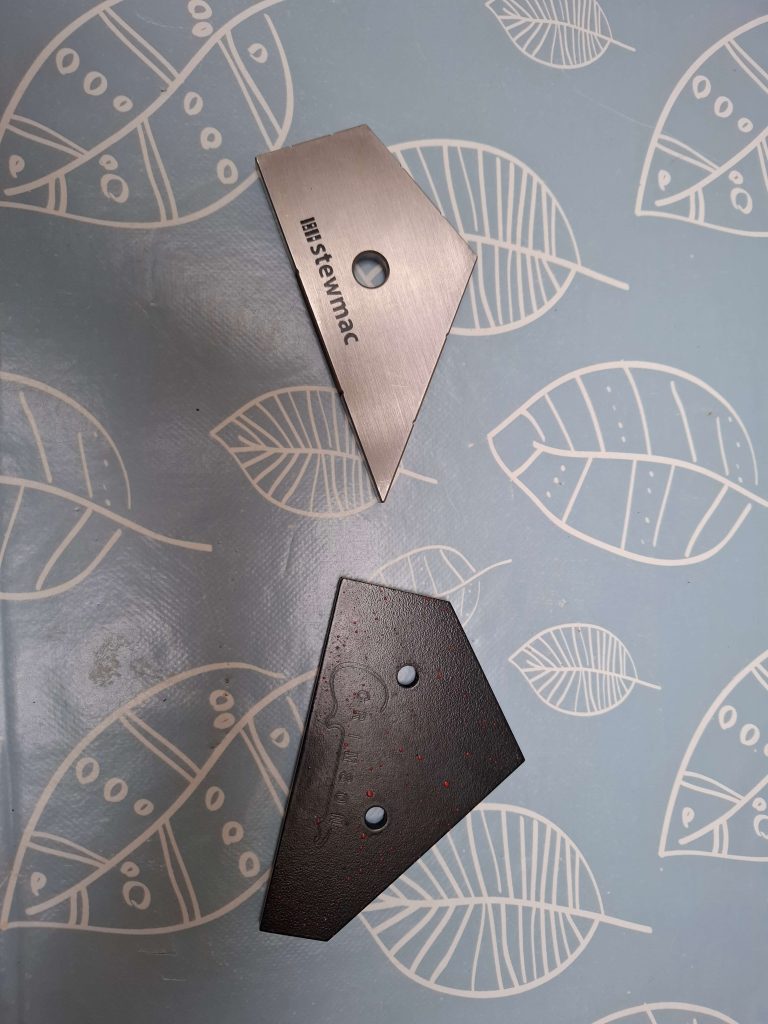
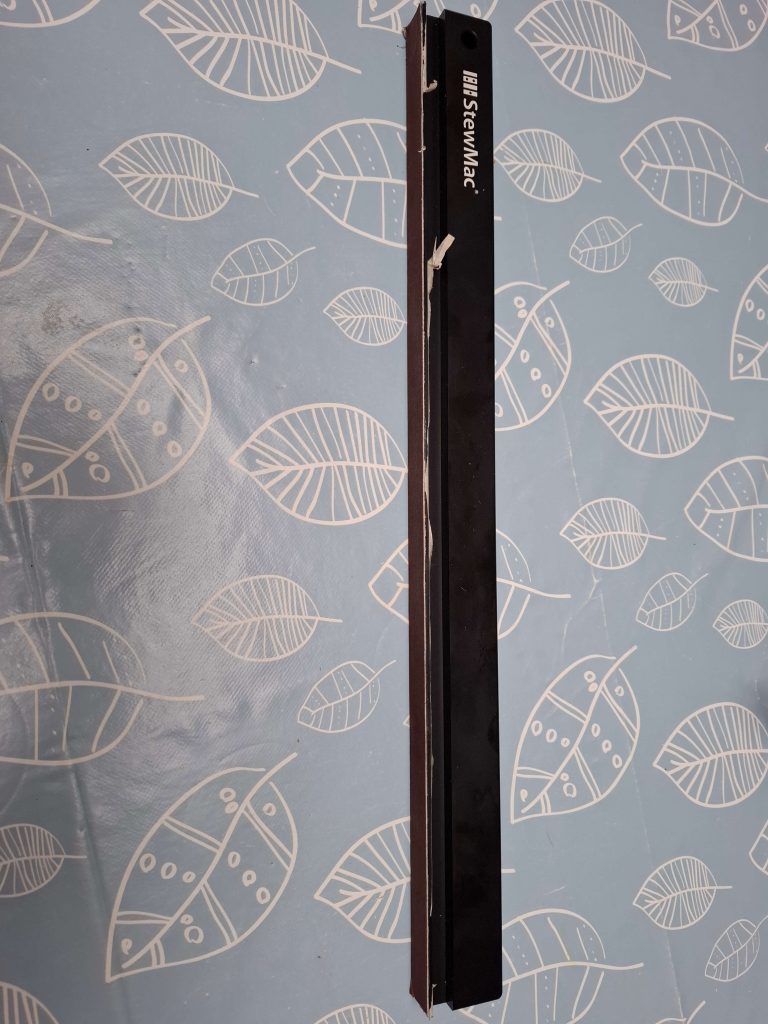
Grab a notched straightedge (you can make one with a metal ruler, by cutting our holes where the frets are if you have to) and a fret rocker (or even a credit card in a pinch).
Place the straightedge across the fretboard and look for gaps. If you can see gaps between the bottom of the straightedge and the fretboard, then your neck is not set straight yet – so use the truss road to dial it in until it’s flat.
When adjusting the truss rod, remember ‘righty tighty, lefty loosey’ and just do a quarter turn at a time then re-check with the straight edge.
Once you have the neck set straight, then move down the fretboard using your fret rocker.
Put the fret rocker across three frets at a time, and if it rocks (and you hear clicking) you’ve got uneven frets (the middle one is higher than the other two).
Use a marker to highlight the high spots (you did mask off your fretboard right?…). Literally draw them onto the frets.
This will serve as your guide during the levelling process.
Fret Levelling Step 3: Level the Frets(!)
Here’s where the magic happens.
Using your fret levelling file or sanding beam, gently sand down the high spots. Work in consistent, even strokes across all the frets, and check your progress frequently with your fret rocker.
In theory, once all the marker pen has disappeared from the frets – they should all be level (in practice you’ll probably need to find tune based on fret rocker results).
Pro tip: if you’re always mindful of your frets, you can prevent issues before they start. Go slow and steady. It’s better to take off too little than too much (you can’t build your frets back up again!).
Step 4: Recrown the Frets (aka Fret Recrowning)
After fret levelling, your frets will be flat on top.
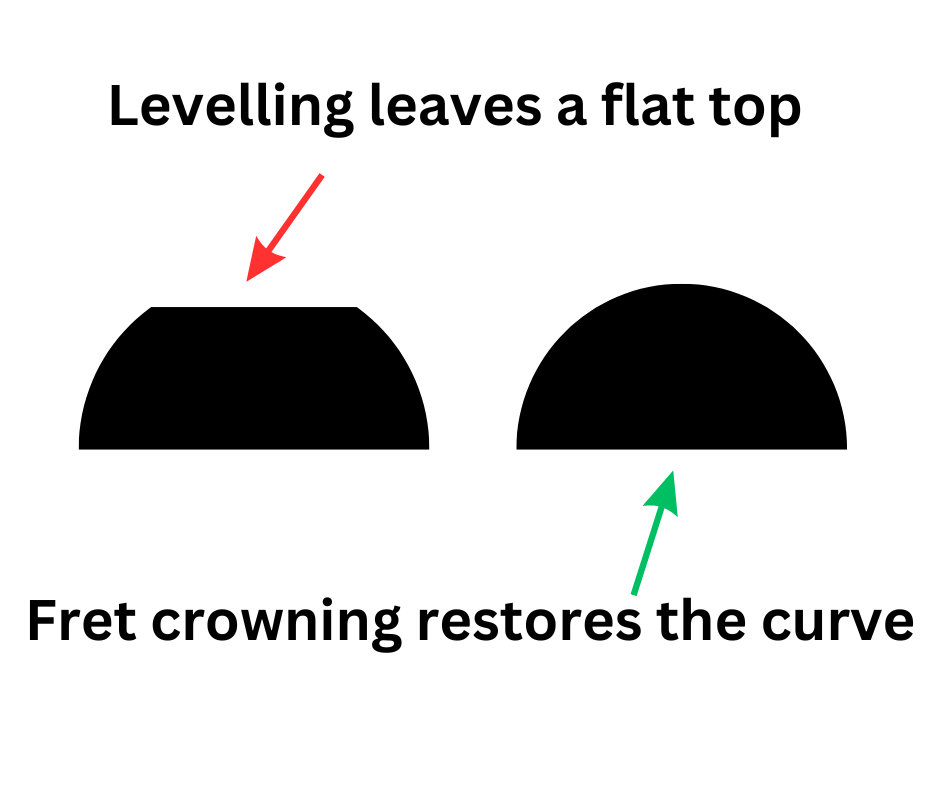
To restore their rounded profile, use a crowning file to reshape them. This ensures the strings make clean contact with the frets, improving playability and tone.
Time to get the marker pen out again! Re mark up all of the frets (all the way across). Then when using your fret crowning file, you want to keep crowning until there is just a hair thin line of marker pen left along the top of the fret, so it’s even.
Depending on the top of crowning file, you might not have much room for error here, so go careful!
If you completely remove the marker pen, then you’ve gone too far – check again with a fret rocker, and (I’m afraid) if you have gone too low, then you’ll need to start the process again from scratch (ask me how I know LOL) 🙁
Step 5: Polish Your Frets to Perfection
Now that your frets are level and crowned, it’s time to make them shine. Start with fine-grit sandpaper or micromesh to smooth out any rough spots, then finish with a metal polish. Your frets will look (and feel) brand new.
There are lots of ways of polishing your frets – in fact you can check out this full article on how to polish your frets step by step.
Step 6: Reassemble and Test
Now you’re on the home straight!
Remove the masking tape, restring your guitar, and if you had to adjust the truss rod to get the neck straight, measure and set the neck relief.
Now give it a test play. If everything’s done right, you should notice a huge improvement in playability and tone. No more buzzes – and you’ll be able to set your action lower (winning!).
Why Let Stu (me) Handle Your Fret Levelling?
While fret levelling is a rewarding DIY project for some, it’s not for everyone.
And realistically this is not something you’d want to do for the 1st time on your vintage Fender Strat or 1950s Gibson…
Here’s why you might want to leave it to a guitar tech (or luthier) like me:
- The Right Tools for the Job
Fret levelling requires specialised tools like fret files, crowning files, and precision straightedges.
These can be expensive and aren’t worth buying if you’re only going to use them once. I’ve already got all the tools needed to do the job right. - Experience Matters
Fret levelling is a delicate process. One wrong move, and you could end up with uneven frets or worse—damage to your fretboard.
With years of experience, I know how to get your frets perfectly level without any guesswork. - Save Time and Stress
Why spend hours sanding and polishing when you could be playing your guitar? Let me handle the hard work so you can get back to making music. - A Complete Setup
While I’m levelling your frets, I can also give your guitar a full setup—adjusting the action, intonation, and truss rod to ensure it plays and sounds its best.
How to Book Your Fret Levelling and Setup Service
Ready to give your guitar the care it deserves? So if you live in Sussex and are able to travel to Haywards Heath, then I can help.
I have customers from across Sussex including:
- Haywards Heath
- Cuckfield
- Balcombe
- Lindfield
- Hustpierpoint
- Brighton
- Crawley
- Hosrsham
So if you live anywhere near these parts of East or West Sussex, then Haywards Heath is a pretty short journey.
Booking a fret levelling service with me is easy:
- Get in Touch: Send me a message or give me a call (check my contact page) to discuss your guitar’s needs and how we can fix any damaged fret.
- Drop Off Your Guitar: Bring your guitar to my workshop, and I’ll take care of the rest.
- Pick Up and Play: Once the job is done, you’ll get your guitar back playing better than ever.
Fret Levelling FAQs
Your common questions answered on fret levelling
Q: What causes dents in guitar frets?
A: Dents in guitar frets are typically caused by regular playing, especially on commonly played frets. Over time, the pressure from strings and fingers can create small dents or divots in the fret wire.
Q: How can I tell if my guitar frets are worn or dented?
A: Look for visible dents or flat spots on the frets. You might also notice fret buzz or changes in the guitar’s playability. Running your fingers along the frets can help you feel any irregularities.
Q: Can I fix a dented fret myself, or should I take it to a repair shop?
A: For minor dents, you can try DIY fixes. However, if the dent is deep enough to cause problems or you’re unsure, it’s best to consult a skilled guitar tech or luthier or take your guitar to a repair shop.
Q: What’s a quick fix for a small dent in a single fret?
A: For a small dent in one fret, you can try using a fret dressing file to carefully level the fret and then crown and polish it. Be cautious, as this process removes fret material, especially if you encounter a damaged fret.
Q: Is it possible to fix deeper dents without replacing the fret?
A: For deeper dents, some guitar techs could use solder to fill the dented area. They apply solder paste, heat it with a soldering iron, and then file and polish the fret. This technique requires skill and practice – and should only be seen as a very temporary fix.
Q: When is refretting necessary instead of just fixing dents?
A: Refretting is necessary when frets are severely worn, have deep dents that can’t be fixed by levelling, or if the guitar has been refretted multiple times before. An old guitar with extensive fret wear might also benefit from a full fret job.
Q: How do I know if a dent is deep enough to cause problems?
A: If you experience fret buzz, note choking, or difficulty in bending strings, the dent might be deep enough to cause issues. Also, if you can easily catch your fingernail on the dent, it’s likely affecting playability.
Q: Can I use super glue to fill small dents in frets?
A: While some guitar forums suggest using super glue as a quick fix for small dents, it’s not recommended. Super glue can be difficult to remove and might interfere with future repairs. It’s better to use proper techniques or consult a professional.
Q: How much does it typically cost to have a single fret replaced?
A: The cost of replacing a single fret can vary depending on your location and the repair person’s experience. Generally, you can expect to pay between £25 to £30 for a single fret replacement on an electric guitar, but always check with your local repair shop for accurate pricing.
Q: How much does it cost to have your frets levelled
A full fret level is going to cost between £40-£50. If you just need some spot levelling this is assessed on a case by case basis (and how many frets need doing) – but prices start around £25.